
Transforming your living space with a fresh coat of paint is one of the most rewarding DIY projects you can undertake, offering immediate visual impact and personal satisfaction.
Whether you’re touching up minor imperfections or embarking on a complete room makeover, having the right painting tools at your disposal makes all the difference between amateur results and professional-looking finishes. The journey to becoming proficient in painting doesn’t require years of experience—it demands knowledge of essential equipment, proper techniques, and a commitment to preparation. This comprehensive guide will walk you through everything you need to master the art of painting, from selecting quality brushes to understanding the nuances of different applicators and accessories that elevate your work from basic to exceptional.
🎨 The Foundation: Understanding Paint Types and Their Applications
Before diving into tools, understanding paint varieties is crucial for project success. Different paints require different application methods, and selecting the wrong tool for your chosen paint can compromise your entire project. Water-based latex paints have become the standard for interior walls due to their low odor, easy cleanup, and quick drying times. Oil-based paints, while less common in residential settings, offer superior durability and smoother finishes for trim work and high-traffic areas.
The sheen level of your paint dramatically affects both appearance and tool selection. Flat and matte finishes hide imperfections beautifully but show touch-ups more readily, requiring careful application techniques. Satin and eggshell finishes provide a subtle glow while maintaining washability, making them ideal for living spaces. Semi-gloss and high-gloss paints deliver maximum durability and are perfect for kitchens, bathrooms, and woodwork, though they demand flawless surface preparation and precise application.
Essential Brushes: Your Primary Painting Instruments
Quality brushes represent the cornerstone of any painting toolkit, and investing in professional-grade options pays dividends in application ease and final appearance. A well-constructed brush features densely packed bristles, a comfortable handle with proper weight distribution, and a ferrule that securely holds bristles without shedding. For most DIY projects, you’ll need at least three brush types to handle various scenarios effectively.
The angled sash brush, typically available in 2 to 2.5-inch widths, is indispensable for cutting in along ceilings, corners, and trim work. Its angled bristles create precise lines without tape, allowing skilled painters to achieve sharp edges quickly. A flat brush in 3 to 4-inch width handles broader flat surfaces, door panels, and furniture refinishing projects. For detailed work around windows, door frames, and intricate moldings, a 1-inch flat or angled brush provides the control necessary for clean application.
Synthetic vs. Natural Bristles: Making the Right Choice
Bristle composition directly impacts paint pickup, release, and finish quality. Synthetic bristles, typically made from nylon, polyester, or blended materials, excel with water-based paints. They maintain their shape when wet, don’t absorb water that would cause them to swell, and clean up easily. Natural bristle brushes, crafted from animal hair, work beautifully with oil-based paints and stains, providing superior flow and leveling characteristics that synthetic options struggle to match.
Premium brushes feature flagged bristles—split ends that hold more paint and create smoother application patterns. The stiffness or flexibility of bristles should match your project requirements, with stiffer bristles suited for rough surfaces and flexible ones ideal for smooth finishes. Proper brush maintenance extends their lifespan significantly; thoroughly cleaning after each use, reshaping bristles while damp, and storing them properly keeps them performing like new for years.
🖌️ Rollers and Roller Covers: Efficiency Meets Quality
Paint rollers revolutionize larger surface coverage, delivering consistent results in a fraction of the time required for brushwork. The roller frame itself should feature a sturdy cage design, comfortable grip, and threaded end cap that accepts extension poles. Standard 9-inch rollers suit most interior walls and ceilings, while 4-inch mini rollers navigate tight spaces, furniture backs, and cabinet interiors with ease.
Roller cover selection proves just as critical as the frame itself, with nap length determining texture and coverage characteristics. Short nap covers (1/4 to 3/8 inch) work best on smooth surfaces like drywall, plaster, and metal, creating minimal texture while maximizing coverage efficiency. Medium nap options (1/2 to 3/4 inch) represent the versatile middle ground, handling lightly textured walls and most general applications. Long nap rollers (3/4 inch and beyond) tackle rough surfaces including stucco, concrete block, and heavily textured walls.
Material Matters in Roller Covers
Polyester roller covers dominate the market for latex paint applications, offering excellent paint pickup and release characteristics while resisting matting during use. Wool or wool-blend covers provide superior performance with all paint types, particularly excelling with oil-based products and enamels. These natural fiber options hold more paint per dip, reducing the frequency of reloading and creating smoother finishes with fewer roller marks.
Microfiber roller covers have emerged as premium options for the most discerning painters, delivering ultra-smooth finishes with minimal stippling or orange peel texture. While more expensive than standard covers, they justify their cost through exceptional performance on doors, cabinets, and any surface requiring a flawless appearance. Regardless of material, quality roller covers maintain their integrity throughout the job without shedding lint or losing shape.
Specialty Tools That Elevate Your Painting Game
Beyond basic brushes and rollers, specialized tools address specific challenges and expand your painting capabilities. Edge painters and pad applicators feature flat foam surfaces that glide along trim and corners, offering an alternative to traditional cutting-in techniques. While they require practice to master, these tools can speed up edge work considerably once you develop proper technique and pressure control.
Paint edgers with built-in wheels or guides help maintain consistent spacing from ceilings and trim, reducing the steady hand required for freehand cutting. Trim guards, available in various materials from plastic to flexible metal, shield surfaces from overspray and roller contact. Though some professionals consider them training wheels, these guides provide confidence for beginners while delivering clean lines without the precision demanded by freehand methods.
Preparation Tools You Cannot Skip ⚙️
Surface preparation determines paint adhesion and longevity more than any other factor in your project. Putty knives and spackling tools fill nail holes, cracks, and imperfections that would telegraph through fresh paint. A quality sanding block or pole sander smooths patched areas and removes glossy surfaces that resist paint adhesion. Tack cloths or microfiber dusting cloths remove sanding dust and debris that would create rough texture in your finish.
Painter’s tape comes in multiple adhesion levels and widths to suit different applications and surface sensitivities. Standard blue tape works for most applications, while delicate surface tapes protect freshly painted walls, wallpaper, and aged surfaces. Specialty tapes include edge-lock varieties that seal against paint bleed-through and flexible options that conform to curved surfaces. Proper tape application technique—pressing edges firmly, removing at the right angle while paint remains slightly tacky—ensures crisp lines without damage.
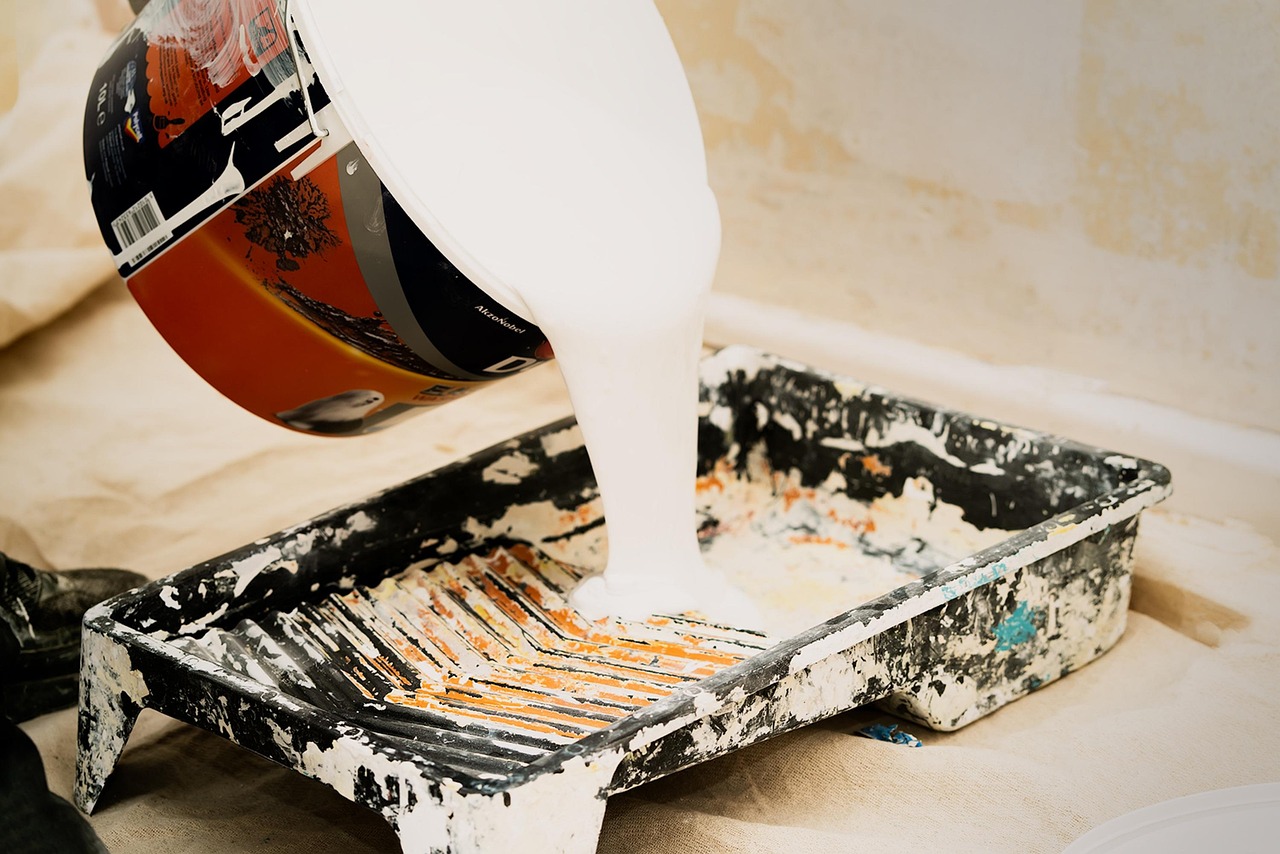
Paint Trays, Grids, and Buckets: Managing Your Paint Supply
Efficient paint management keeps your workflow smooth and minimizes waste throughout the project. Standard roller trays work adequately for small jobs, but investing in deep-well trays prevents spills and accommodates more paint for extended rolling sessions. Metal trays outlast plastic alternatives and clean more thoroughly, though heavier weight makes them less portable for ladder work.
Roller grids that hang inside 5-gallon buckets represent a professional approach to paint management, offering several advantages over traditional trays. Buckets hold significantly more paint, reducing refill frequency during large projects. The grid system removes excess paint from rollers more effectively than trays, ensuring proper loading without drips. This setup also works beautifully with paint sprayers, providing a stable base for mixing and loading.
Liners and Maintenance Shortcuts
Disposable tray liners eliminate cleanup time between colors or at project completion, simply peel away the liner and your tray remains pristine. While adding cost per project, the time savings and water conservation often justify the expense. For bucket users, 5-gallon liner bags serve the same purpose while containing enough paint for entire rooms. Pour-spouts that attach to paint cans prevent drips down container sides and enable more controlled pouring into trays or buckets.
Maintaining liquid paint in applicators between work sessions requires proper storage techniques. Brush and roller covers can be wrapped tightly in plastic bags or aluminum foil, then refrigerated to prevent drying for several days. For extended breaks, thoroughly cleaning and drying tools prevents hardened paint buildup that ruins brushes and covers. Quality brush combs remove paint deep in bristles, restoring them to like-new condition when cleaning is complete.
🏠 Extension Poles and Ladders: Reaching New Heights Safely
Extension poles transform standard rollers into ceiling and high-wall painting tools, eliminating constant ladder repositioning while improving painting ergonomics. Adjustable poles ranging from 4 to 12 feet handle most residential ceiling heights, with lightweight fiberglass or aluminum construction preventing arm fatigue. The threaded connection must securely grip roller frames without wobbling, ensuring controlled application even at full extension.
Despite pole advantages, ladder access remains necessary for detailed trim work and cutting in at ceiling lines. Step ladders in 6 to 8-foot heights suit most interior projects, with non-slip feet and sturdy construction ensuring stability. Extension ladders access exterior second-story work, requiring proper angle setup and secure footing. Ladder safety cannot be overstated—maintaining three points of contact, avoiding overreaching, and positioning on level ground prevents the injuries that plague careless DIYers.
Drop Cloths and Surface Protection: Preventing Disasters
Protecting floors, furniture, and fixtures from paint damage demonstrates professionalism and foresight that separates careful DIYers from sloppy amateurs. Canvas drop cloths offer superior protection and durability compared to plastic alternatives, absorbing spills rather than creating slippery puddles. They lay flat without bunching, remain in place during movement, and last through countless projects when properly maintained.
Plastic sheeting works well for covering furniture and built-ins that won’t experience foot traffic, offering inexpensive protection with complete moisture blocking. However, paint droplets remain wet on plastic surfaces, easily transferring to shoes and spreading throughout your workspace. For flooring, plastic-backed canvas combines the slip-resistance of fabric with the moisture barrier of plastic, delivering optimal performance for messy projects.
Masking and Detail Protection
Masking film dispensers apply protective sheeting with integrated tape strips, dramatically speeding up the process of covering windows, doors, and large fixtures. The pre-attached tape eliminates fumbling with separate rolls while ensuring secure adhesion along edges. For smaller details like light switches, outlets, and hardware, foam masking products conform to three-dimensional shapes that tape cannot adequately cover.
Door and floor protection systems include foam-backed runners that protect heavily trafficked areas during multi-day projects. These specialized products prevent tracking paint through finished areas while providing cushioning that prevents cracks in delicate tiles. Though representing additional investment, protection systems prevent damage that costs far more to repair than prevention required.
💡 Lighting and Inspection Tools for Perfect Results
Proper lighting reveals surface imperfections, missed spots, and application inconsistencies invisible under standard room illumination. Portable work lights with adjustable stands position bright illumination exactly where needed, casting shadows that highlight texture variations and coverage gaps. LED options provide daylight-balanced lighting while remaining cool to touch and energy-efficient throughout extended work sessions.
Raking light—positioning a light source at an acute angle to painted surfaces—represents a professional inspection technique that exposes every flaw. Before declaring a project complete, conduct a raking light inspection from multiple angles, addressing any holidays (missed spots), drips, or texture inconsistencies revealed. Touch-up work performed immediately while paint remains workable blends seamlessly, whereas delayed corrections often show as distinct patches.
Cleaning and Maintenance: Protecting Your Investment
Quality painting tools represent a significant investment that rewards proper care with years of reliable service. Brush cleaning begins immediately after use, working solvent or soap deep into bristles while flexing them to release trapped paint. A brush spinner accelerates drying while reshaping bristles, though manual techniques achieve similar results with patience. Store cleaned brushes hanging or lying flat, never standing on bristles which causes permanent deformation.
Roller covers warrant cleaning only if they’re premium quality; most painters discard standard covers after use given their low cost. When cleaning quality covers, use a roller cleaner tool that squeezes paint from the nap while flushing with appropriate solvent. Spin or squeeze excess water, then store covers standing on end to maintain proper shape. Paint trays and buckets clean easily when addressed promptly, but hardened paint may require scraping or replacement.
Building Your Personal Painting Kit: A Strategic Approach
Assembling a comprehensive painting toolkit requires balancing initial investment against long-term utility and project scope. Beginners should prioritize quality over quantity, purchasing fewer tools at professional grade rather than extensive collections of mediocre equipment. A starter kit including two quality brushes, a standard roller frame with assorted nap covers, painter’s tape, and basic preparation tools handles most common projects while teaching fundamental techniques.
As skills develop and project ambitions grow, incrementally add specialized tools that address specific needs revealed through experience. Track which tools see frequent use versus those gathering dust, informing future purchasing decisions. Organize tools in a dedicated container or bag, ensuring everything remains clean, dry, and ready for the next project. A well-maintained, thoughtfully curated toolkit becomes more valuable over time, enabling increasingly ambitious projects with confidence and efficiency.
Embracing Technology: Digital Tools for Modern Painters 📱
Modern technology offers valuable support for painting projects through specialized applications and digital resources. Color matching apps use smartphone cameras to identify paint colors from photographs, simplifying the process of matching existing shades or finding coordinating hues. Paint calculators determine precise quantities needed based on room dimensions, reducing waste and ensuring adequate supply. Project planning applications help organize multi-room renovations, track costs, and schedule work phases efficiently.
Online tutorials and video demonstrations provide visual instruction that surpasses written descriptions, allowing DIYers to learn advanced techniques from professional painters worldwide. Community forums connect enthusiasts facing similar challenges, offering troubleshooting advice and moral support when projects become frustrating. While technology cannot replace hands-on practice, these digital resources accelerate skill development and expand knowledge beyond what individual experience alone provides.
Achieving Professional Results Through Practice and Patience
Mastering painting requires accepting that initial attempts may not meet expectations while recognizing that each project builds skills and confidence. Professional painters develop their expertise through thousands of hours of practice, experimenting with techniques, learning from mistakes, and continuously refining their approach. Embrace imperfection as part of the learning process, understanding that even flawed results represent progress toward competency.
Start with forgiving projects in low-visibility areas, gradually progressing to more prominent spaces as abilities improve. Practice cutting in on scrap materials before tackling actual walls, developing the steady hand and brush control that precise work demands. Experiment with different tools and techniques, discovering personal preferences that optimize your individual workflow. The journey from novice to skilled painter unfolds gradually, but with quality tools, proper technique, and persistent effort, stunning results become achievable for dedicated DIY enthusiasts.
The transformation of living spaces through painting delivers satisfaction that extends beyond visual improvement, creating a sense of accomplishment and capability that encourages further creative projects. Armed with essential tools, proper knowledge, and commitment to quality, you possess everything necessary to execute flawless touch-ups and stunning renovations that rival professional work. Each brushstroke contributes to your growing expertise, building confidence and skill that serve you throughout a lifetime of creative home improvement endeavors.


