
A leaky faucet might seem like a minor inconvenience, but it’s silently draining both your water supply and your wallet. The constant dripping can waste thousands of gallons annually while inflating your utility bills.
Every drop that escapes from your faucet represents wasted resources and unnecessary expenses. Whether it’s a slow drip in the bathroom or a steady stream in the kitchen, fixing these leaks is easier than you might think. With basic tools and a little patience, you can tackle this common household problem yourself and start seeing immediate savings. Let’s explore how you can stop the drip and reclaim control over your water consumption and finances.
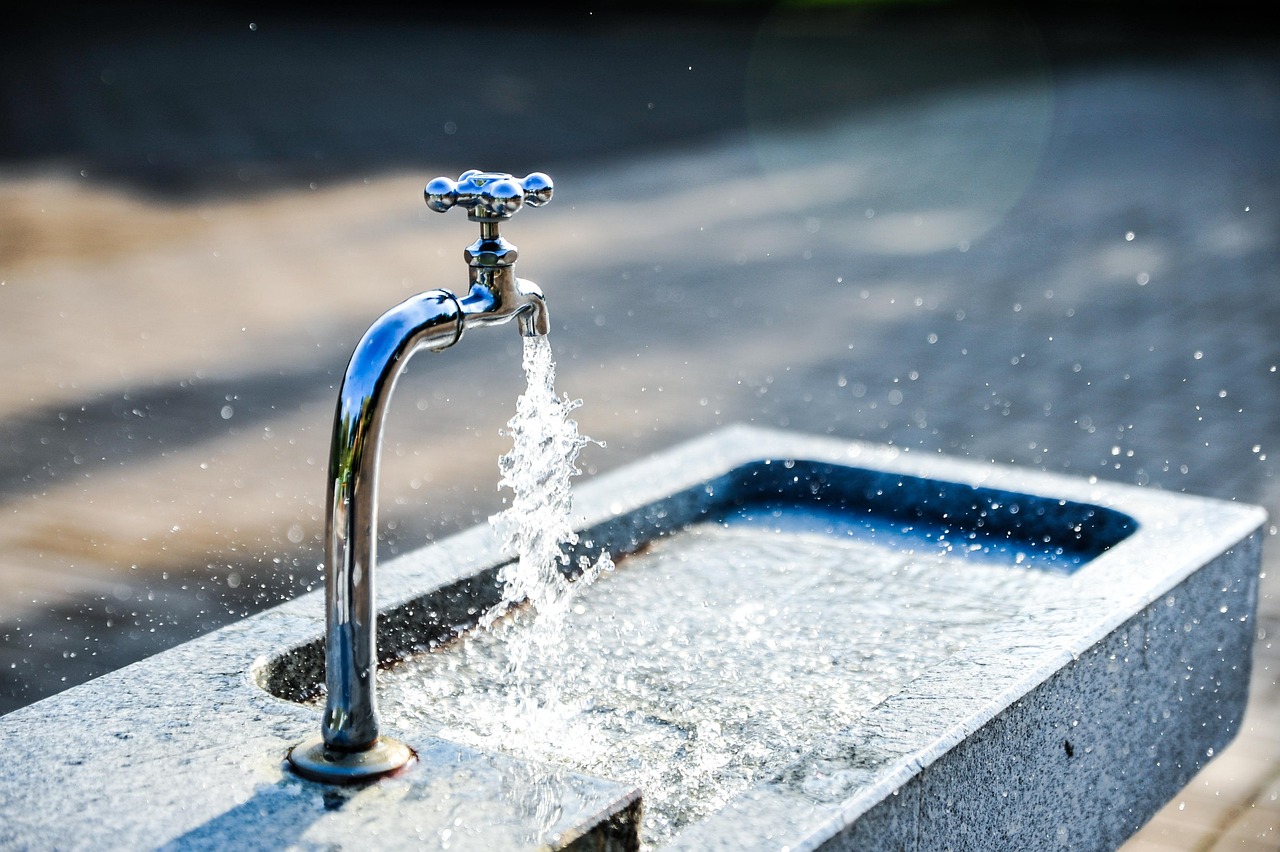
💧 The True Cost of Ignoring That Dripping Faucet
Before diving into repairs, understanding the financial impact of a leaky faucet can provide serious motivation. A single faucet dripping at one drop per second wastes approximately 3,000 gallons of water per year. That’s enough water to take more than 180 showers! When you calculate this at average water rates, you’re looking at roughly $30-60 annually per faucet, and that’s just for a slow drip.
The environmental impact extends beyond your personal finances. Water scarcity affects communities worldwide, and conservation starts at home. Every gallon you save contributes to broader sustainability efforts. Additionally, if your leaky faucet involves hot water, you’re also wasting energy used to heat that water, adding another layer to your utility costs.
🔧 Identifying the Type of Leak You’re Dealing With
Not all faucet leaks are created equal. Understanding what type of faucet you have determines the repair approach you’ll need. The four main types include compression faucets, ball faucets, cartridge faucets, and ceramic disk faucets. Each operates differently and requires specific repair techniques.
Compression Faucets
These are the oldest and most common types, featuring separate hot and cold water handles. When you turn the handle, a washer compresses against the valve seat to stop water flow. Leaks typically occur when this washer becomes worn or the valve seat corrodes. These are generally the easiest to repair and the most likely culprits in older homes.
Ball Faucets
Commonly found in kitchens, ball faucets have a single handle that moves over a rounded ball-shaped cap. The ball contains chambers and springs that regulate water flow and temperature. These faucets have more parts that can fail, making them slightly more complex to repair but still manageable for DIY enthusiasts.
Cartridge Faucets
These feature either single or double handles and use a cartridge mechanism to control water flow. They’re recognizable by their smooth, consistent movement when operating the handle. Cartridge faucets are reliable but when they leak, usually the entire cartridge needs replacement rather than individual component repair.
Ceramic Disk Faucets
The newest technology in faucet design, these use ceramic cylinders that slide past each other to control water flow. They’re extremely durable and long-lasting. When leaks occur, it’s typically due to sediment buildup rather than component failure, making them often the simplest to fix.
🛠️ Essential Tools and Materials You’ll Need
Before starting your repair project, gather the necessary tools and materials. Having everything on hand prevents frustrating mid-project trips to the hardware store. Most repairs require only basic household tools you probably already own.
- Adjustable wrench or pliers
- Screwdrivers (both flathead and Phillips)
- Allen wrenches (hex keys)
- Replacement washers, O-rings, or cartridge (depending on your faucet type)
- Plumber’s grease
- White vinegar for cleaning mineral deposits
- Clean rags or towels
- Flashlight for inspecting dark spaces
- Bucket or container to catch water
- Penetrating oil (for stubborn components)
📋 Step-by-Step Guide to Fixing Common Faucet Leaks
Preparing Your Workspace
Proper preparation prevents complications and water damage. Start by shutting off the water supply to the faucet you’re repairing. Look for shut-off valves under the sink; turn them clockwise until tight. If you can’t locate individual valves, you may need to shut off your home’s main water supply temporarily.
Once the water is off, turn the faucet handles to the open position to release any remaining water pressure. Place a bucket beneath the sink to catch residual water. Plug the sink drain with a rag to prevent losing small parts down the drain. Lay out a towel on your work surface to organize components as you remove them.
Repairing a Compression Faucet
For compression faucets, the most common issue is a worn washer. Remove the decorative cap on the handle using a flathead screwdriver, exposing the handle screw. Unscrew and remove the handle. Use an adjustable wrench to loosen and remove the packing nut, then unscrew the stem from the faucet body.
At the bottom of the stem, you’ll find the washer secured by a brass screw. Remove this screw and the old washer. Examine the valve seat inside the faucet body for roughness or corrosion, which can prevent a good seal even with a new washer. If damaged, use a valve seat wrench to remove and replace it.
Install the new washer, ensuring it’s the exact same size as the original. Apply a thin coat of plumber’s grease to the washer, then reassemble the faucet in reverse order. Turn the water supply back on and test for leaks.
Fixing a Ball Faucet
Ball faucet repairs often benefit from purchasing a replacement kit that includes all necessary springs, seals, and sometimes a new ball. Loosen the setscrew on the handle using an Allen wrench, then remove the handle. Unscrew the cap and collar using pliers, revealing the cam and cam washer.
Lift out these components along with the rotating ball. Using needle-nose pliers, remove the inlet seals and springs from the faucet body. Inspect the ball for corrosion or damage; replace if necessary. Install new springs and seals from your repair kit, ensuring they’re seated properly in their recesses.
Reassemble the faucet with the new components, aligning the ball’s slot with the pin inside the faucet body. Tighten everything securely but avoid over-tightening, which can crack components. Restore water supply and check your work.
Replacing a Cartridge
For cartridge faucets, replacement is usually more practical than repair. Remove the handle by loosening the setscrew and lifting off. Remove any retaining clip or nut securing the cartridge using pliers. Grasp the cartridge stem with pliers and pull straight up to remove it.
Take the old cartridge to a hardware store to ensure you purchase the correct replacement—they vary significantly by manufacturer. Install the new cartridge, paying careful attention to alignment and orientation. Most cartridges have a flat side or notch that must match the faucet body. Reassemble the handle and test.
Servicing a Ceramic Disk Faucet
These rarely need part replacement. Lift off the handle and remove the disk cylinder by unscrewing the mounting screws. Remove the neoprene seals from the cylinder and clean them along with the cylinder openings using white vinegar to dissolve mineral deposits.
If seals are damaged or worn, replace them with exact matches. Reassemble carefully, ensuring the cylinder seats correctly. When turning the water back on for ceramic disk faucets, open it gradually to prevent pressure damage to the ceramic disks.
💡 Preventing Future Leaks and Extending Faucet Life
Prevention is always easier and cheaper than repair. Regular maintenance can significantly extend your faucet’s lifespan and prevent leaks before they start. Simple habits make a substantial difference in long-term performance.
Avoid using excessive force when turning faucets on or off. Over-tightening accelerates wear on seals and washers. Clean faucet aerators monthly by unscrewing them, removing debris, and soaking them in vinegar to prevent mineral buildup that can cause uneven water flow and pressure issues.
If you live in an area with hard water, consider installing a water softener. Mineral deposits from hard water accelerate wear on faucet components and can cause premature failure. Periodically check under sinks for moisture or early signs of leaks, allowing you to address problems before they become serious.
🚨 When to Call a Professional Plumber
While most faucet repairs are DIY-friendly, certain situations warrant professional help. If you’ve attempted a repair but the leak persists, you might be dealing with underlying issues like corroded pipes or incorrect faucet installation that requires expert diagnosis.
Leaks that originate from behind the wall rather than the faucet itself indicate pipe problems beyond simple faucet repair. If you encounter stripped threads, broken valve seats that can’t be replaced, or severely corroded components, a plumber has specialized tools and expertise to handle these complications.
Additionally, if you’re uncomfortable working with plumbing or lack the necessary tools, professional repair costs are typically reasonable for faucet work and provide peace of mind with guaranteed results.
💰 Calculating Your Water and Money Savings
Understanding your actual savings provides tangible proof of your repair efforts’ value. Use this simple calculation to estimate your annual savings from fixing a leaky faucet:
| Drip Rate | Gallons Wasted Annually | Approximate Cost (at $0.015/gallon) |
|---|---|---|
| 1 drip per second | 3,000 gallons | $45 |
| 10 drips per second | 30,000 gallons | $450 |
| Fast drip/thin stream | 100,000+ gallons | $1,500+ |
These figures don’t account for hot water waste, which adds heating costs. A hot water leak can increase your energy bill by 5-10% depending on your water heater type and efficiency. Over a faucet’s typical 15-year lifespan, proper maintenance and timely repairs can save thousands of dollars.
🌍 Environmental Impact Beyond Your Home
Your individual action creates ripple effects in the broader community and environment. Water treatment and distribution require significant energy, meaning wasted water equals wasted electricity and increased carbon emissions. By fixing leaks, you’re reducing demand on water treatment facilities and contributing to lower community-wide energy consumption.
In drought-prone regions, residential water conservation becomes even more critical. Your repaired faucet helps maintain water availability for agriculture, industry, and ecosystem health. Teaching children about water conservation through hands-on repairs like fixing faucets instills lifelong environmental stewardship values.
🎯 Quick Troubleshooting Tips for Common Issues
Even after repairs, you might encounter minor issues. If your faucet drips only when handles are in certain positions, the stem or cartridge may not be fully seated—disassemble and reinstall with attention to proper alignment. A faucet that leaks around the handle when water is running indicates worn O-rings on the stem, which are easily replaceable.
Low water pressure after reassembly usually means you’ve accidentally closed the shut-off valve partially, or debris has lodged in the aerator during work. Check both before assuming something went wrong with your repair. If water sprays around the handle base, you’ve likely cross-threaded something during reassembly—carefully disassemble and reinstall.
✨ Upgrading While You Repair: Worth Considering?
If your faucet is very old or you’re making frequent repairs, replacement might be more economical than continued maintenance. Modern faucets offer better water efficiency with flow rates as low as 1.5 gallons per minute compared to older models that use 2.5 GPM or more. This efficiency translates to additional savings over time.
Water-sensing faucets eliminate waste from leaving water running while soaping hands or brushing teeth. While more expensive initially, they’re particularly valuable in households with children who forget to turn off faucets. Many newer models also feature ceramic disk technology that virtually eliminates traditional leak problems.
When calculating upgrade costs, factor in your water rates, expected longevity of new versus old fixtures, and the frequency of repairs you’re currently making. Sometimes investing $100-200 in a quality new faucet saves more money than repeatedly repairing a $40 faucet that’s reached the end of its serviceable life.
🔍 Final Inspection and Quality Assurance
After completing your repair, thorough testing ensures your work will hold up long-term. Turn the water supply on slowly, watching carefully for any leaks from connections you’ve disturbed. Run both hot and cold water through the faucet at various pressures, checking for drips from the spout and around the base.
Let the faucet sit in the off position for several hours, periodically checking for drips. Sometimes leaks only appear after components have time to settle. Check under the sink for moisture around supply connections, as vibrations from your work might have loosened these fittings slightly.
Document your repair with photos and save receipts for parts. Note the date, parts replaced, and any unusual observations in a home maintenance log. This information proves invaluable for future repairs and helps identify patterns if problems recur. Consider setting a reminder to inspect the faucet again in six months to catch any developing issues early.
Taking control of leaky faucet repairs empowers you as a homeowner while delivering immediate financial and environmental benefits. The skills you’ve learned apply to numerous other household maintenance tasks, building your confidence for future DIY projects. Every drop you save contributes to a more sustainable lifestyle and keeps more money in your pocket where it belongs. Start today—your wallet and the planet will thank you.


